Conectar uma impressora
A instalação da impressora pode ser feita em algumas etapas simples. A impressora pode ser usada para imprimir recibos, etiquetas, pedidos ou até mesmo relatórios dos diferentes aplicativos Odoo. Além disso, as ações da impressora podem ser atribuídas como uma ação em um gatilho durante o processo de fabricação ou adicionadas a um ponto de controle de qualidade ou a uma verificação de qualidade.
Aviso
The only way to connect a printer directly to an Odoo database is through the use of an IoT system. Without an IoT system, printing can still occur, but it is managed through the printer itself, which is not the recommended process.
Conexão
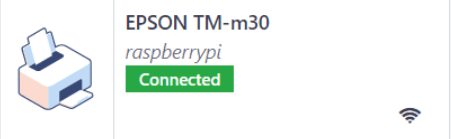
IoT systems support printers connected through USB, network connection, or Bluetooth. Supported printers are detected automatically, and appear in the Devices list of the IoT app.
Nota
Printers can take up to two minutes to appear in the IoT app Devices list.
Link a printer
Link work orders to a printer
Work orders can be linked to printers, via a quality control point, to print labels for manufactured products.
In the Quality app, a device can be set up on a quality control point. To do so, go to the , and open the desired control point.
Importante
A manufacturing operation and work order operation need to be attached to a quality control point before the Type field allows for the Print Label option to be selected.
From here, edit the control point by selecting the Type field, and selecting Print Label from the dropdown menu of options. Doing so reveals the Device field, where the attached device can be selected.
A impressora agora pode ser usada com o ponto de controle de qualidade selecionado. Quando o ponto de controle de qualidade é alcançado durante o processo de fabricação, o base de dados apresenta a opção de imprimir etiquetas para um produto específico.
Dica
Quality control points can also be accessed by navigating to , then selecting the device. Go to the Quality Control Points tab to add them to the device.
Nota
On a quality check form, the Type of check can also be set to Print Label.
Veja também
Link reports to a printer
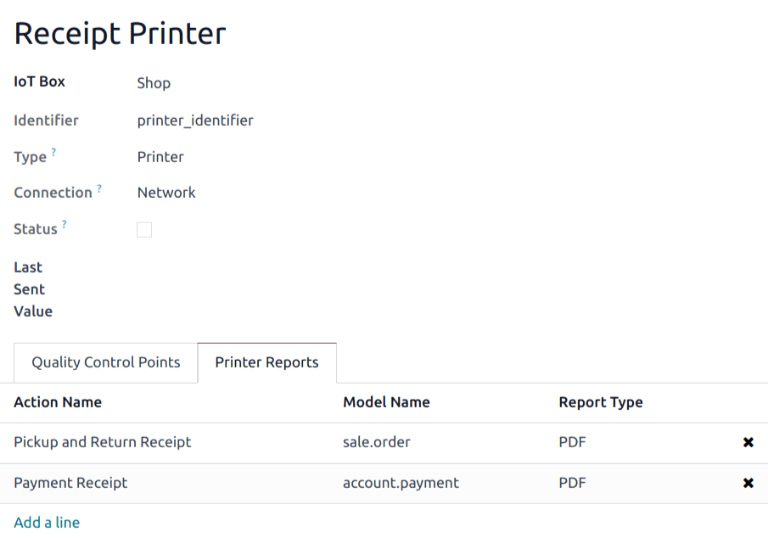
It is possible to link report types to a specific printer. To do so:
Go to and select the desired printer.
Go to the Printer Reports tab and click Add a line.
In the pop-up that opens, select the types of reports to be linked to the printer and click Select.
Dica
Reports can also be configured by enabling the developer mode and going to . Select the desired report from the list and set an IoT Device.
A primeira vez que um relatório vinculado é selecionado para impressão, aparece uma janela pop-up Selecionar impressoras. Marque a caixa de seleção junto à impressora adequada para o relatório e clique em Imprimir. Nessa altura, o relatório é vinculado à impressora.
Limpar cache da impressora do dispositivo
Depois de uma impressora ser vinculada para imprimir um relatório, a definição é salva em cache no navegador. Isso significa que um usuário pode ter diferentes dispositivos salvos em cache para diferentes relatórios, com base no dispositivo que utiliza para acessar o Odoo. Também significa que diferentes usuários podem imprimir relatórios automaticamente a partir de diferentes impressoras, com base nas suas preferências.
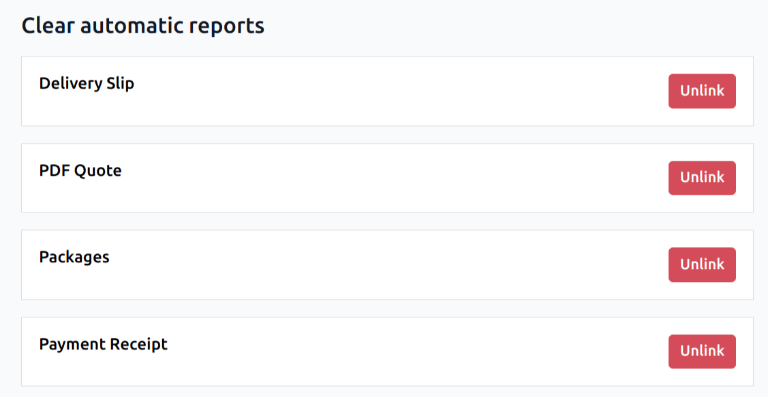
To unlink a report from a printer, navigate to . This generates a list of reports that are linked to a printer on the current device. Click the Unlink button next to each report to remove the link.
Importante
Este passo apenas impede que o relatório seja impresso automaticamente na impressora listada a partir do navegador atual. O relatório continua vinculado no dispositivo, na aba Relatórios da impressora.
Veja também
Potential issues
A impressora não foi detectada
If a printer does not appear in the devices list, go to the IoT box’s or Windows virtual IoT’s homepage, click Show in the Devices section, and make sure the printer is listed.
If the printer does not appear on the IoT system’s homepage, click Printer Server, then Administration, and Add Printer. If the printer is not in the list, it is likely not connected properly.
A impressora emite um texto aleatório
Para a maioria das impressoras, o driver correto deve ser detectado e selecionado automaticamente. Entretanto, em alguns casos, o mecanismo de detecção automática pode não ser suficiente e, se nenhum driver for encontrado, a impressora poderá imprimir caracteres aleatórios.
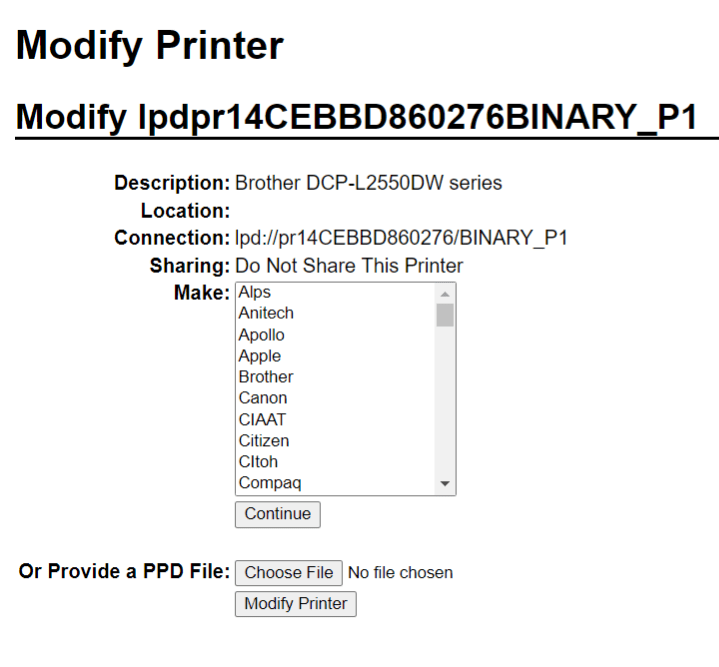
The solution is to manually select the corresponding driver. On the IoT system’s homepage, click Printer Server, then Printers, and select the printer in the list. In the Administration dropdown menu, click Modify Printer. Follow the steps and select the printer’s make and model.
Nota
As impressoras de recibos da Epson e as impressoras de etiquetas da Zebra não precisam de um driver para funcionar. Certifique-se de que não haja drivers selecionados para essas impressoras.
A impressora foi detectada, mas não foi reconhecida corretamente
If Odoo and the IoT system do not recognize the printer correctly, go to , click the device’s card to access its form, and set the Subtype field to the appropriate option: Receipt Printer, Label Printer, or Office Printer.
Caso especial de configuração da Epson
Most Epson printers support printing receipts in Odoo Point of Sale using the GS v 0 command.
However, the following Epson printer models do not support this command:
TM-U220
TM-U230
TM-P60
TMP-P60II
To bypass this issue, you can configure the printer to use the ESC * command.
First, review Epson’s website for compatibility for both the GS v 0 and ESC * commands.
If the printer is incompatible with GS v 0 but supports ESC *, configure the IoT system to use
the ESC * command as follows:
Access the IoT box’s or Windows virtual IoT’s homepage.
Click the Printer server button, then click Administration on the CUPS page.
Click Add Printer in the Printers section, select the printer, and click Continue.
Dica
If the printer’s name is still uncertain, take the following steps:
Take note of the listed printers on the CUPS page.
Desligue a impressora e atualize a página.
Compare the difference with the first list to see which printer disappeared.
Ligue novamente a impressora e atualize a página.
Verifique novamente a lista para ver se a impressora reaparece.
The printer that disappeared and reappears again on the listed printers is the name of the printer in question. It can be Unknown under Local printers.
On the Add Printer page, specify the printer’s Name using the following convention:
<printer_name>__IMC_<param_1>_<param_2>_..._<param_n>__, where:printer_nameis the printer’s name. It can contain any character except_,/,#, or ` ` (space character).IMC: Significa Image Mode Column (o nome simplificado deESC *).param_1: Isso representa o parâmetro específico:SCALE<X>: Scale of the picture (with the same aspect ratio).Xshould be an integer describing the scale percentage that should be used. For example,100is the original size,50is half the size, and200is twice the size.LDV: Low Density Vertical (será definido como High Density Vertical se não for especificado).LDH: Low Density Horizontal (será definido como High Density Horizontal se não for especificado).
Nota
Density parameters might need to be configured in a particular way, depending on the printer model.
Refer to Epson’s ESC * documentation to determine if the printer requires these parameters to be set.
Example
A seguir, exemplos de formatação correta e incorreta de nome:
Formatação correta do nome:
EPSONTMm30II__IMC__EPSON_TM_U220__IMC_LDV_LDH_SCALE80__
Formatação incorreta do nome (isso não impedirá a impressão, mas o resultado pode não ser o esperado):
EPSON TMm 30II: The name cannot contain spaces.EPSONTMm30II: The name itself is correct, but it will not useESC *.EPSONTMm30II__IMC: This name is missing the end__.EPSONTMm30II__IMC_XDV__: The parameterXDVdoes not match any existing parameters.EPSONTMm30II__IMC_SCALE__: The parameterSCALEis missing the scale value.
Once the printer’s name has been defined using the appropriate naming convention, click Continue.
Set the Make value to Raw and the Model value to Raw Queue (en).
Click Add Printer. If everything was done correctly, the page should redirect to the Banners page.
Wait a few minutes for the IoT system to detect the printer and sync to Odoo’s server.
Access the POS settings and select your POS, or click the vertical ellipsis button (⋮) on a POS card and click Edit. Scroll down to the Connected Devices section, enable IoT Box, and select the printer in the Receipt Printer field. Click Save.
Nota
If the printer was set up incorrectly (e.g., it continues to print random text, or the printed receipt is too large or too small), it cannot be modified via the printer’s name in CUPS. Instead, configure a new printer from scratch with modified parameters, following the steps above.
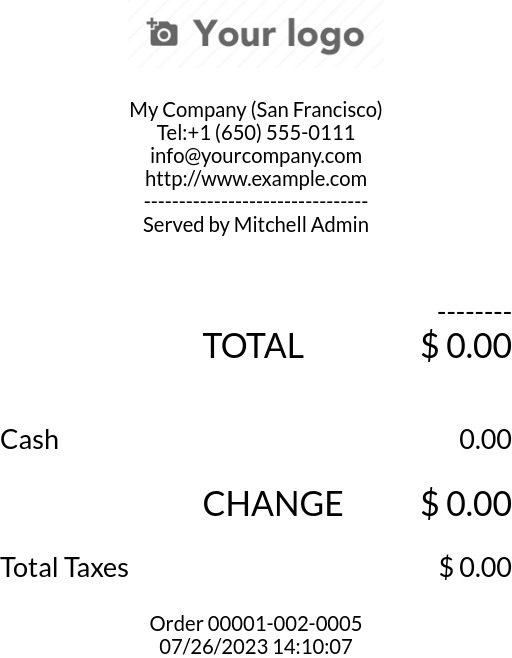
A seguir, um exemplo do processo de solução de problemas para um modelo de impressora TM-U220B usando o comando ESC *. O recibo ilustrado abaixo é um exemplo de recibo que está sendo impresso corretamente devido à formatação adequada (em teoria):
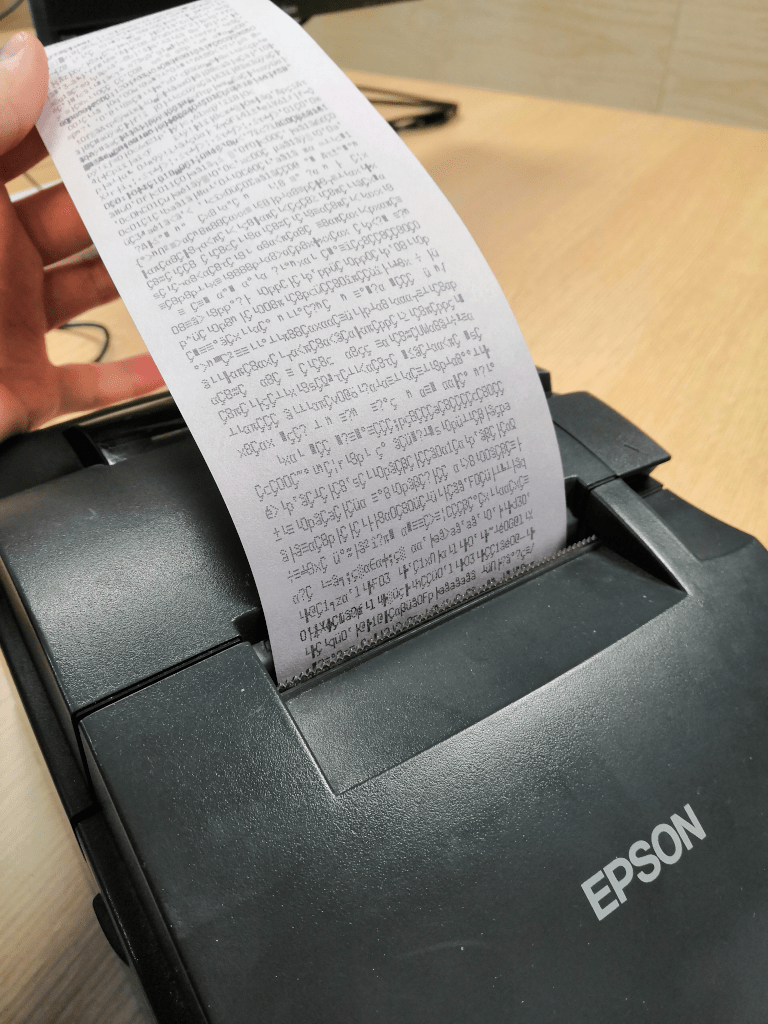
Printing this receipt immediately without proper formatting will not work, as the TM-U220B
printer model does not support the GS v 0 command. Instead, random characters will be printed:
To properly configure formatting for the Epson TM-U220B printer model, follow these steps:
After checking Epson’s website for compatibility with both the GS v 0 and ESC * commands, the TM-U220B printer is indeed incompatible with
GS v 0but supportsESC *.
When adding the printer, CUPS displays the list of available printers:

In this case, the printer is connected via USB, so it is not part of the Discovered Network Printers. Instead, it is likely part of the Unknown selection under Local Printers. By unplugging the printer’s USB cable from the IoT system and refreshing the page, the Unknown printer disappears. By plugging it back in, the printer reappears.
For the naming convention, since the printer must print using the
ESC *command, it is imperative to add__IMC.
For this particular model (TM-U220)
mshould be equal to 0 or 1. While referencing the Description table on Epson’s ESC * website, themvalues could be 0, 1, 32, or 33. So, in this case, themvalue cannot be 32 or 33 (otherwise, random characters will be printed).The table includes the numeric values 32 and 33; they both occur if the Number of bits for vertical data is set to 24, i.e. it has a High Vertical Density. In the case of configuring the Epson TM-U220, the Low Vertical Density will need to be forced, as this printer model does not support High Vertical Density for this command
ESC *.Para adicionar uma Low Vertical Density (baixa densidade vertical), adicione o parâmetro
LDVà convenção de nomenclatura.
Click Continue to proceed. Next, set the Make value to Raw and the Model value to Raw Queue (en).

However, when trying to print with the naming convention
EpsonTMU220B__IMC_LDV__, the receipt is printed, but it is too large and outside the margin. To resolve this, add a new printer (and naming convention) with theSCALE<X>parameter to adapt to the receipt’s size.Alguns exemplos:
Convenção de nomenclatura de impressoras
EpsonTMU220B__IMC_LDV__EpsonTMU220B__IMC_LDV_SCALE75__EpsonTMU220B__IMC_LDV_LDH__EpsonTMU220B__IMC_LDV_LDH_SCALE35__


Problema de impressão da DYMO LabelWriter
The DYMO LabelWriter has a known issue in printing with IoT systems. The OpenPrinting CUPS server installs the printer using Local RAW Printer drivers. In order to print anything, the correct Make and Model needs to be set to reference the correct driver when using the device.
Additionally, a new printer needs to be added to reduce the print delay that occurs after updating the driver.
Importante
The DYMO LabelWriter 450 DUO printer is the recommended DYMO printer for use with Odoo and IoT systems. This device combines two printers: a label printer and a tape printer. When configuring the following processes, it is essential to select the correct model (either DYMO LabelWriter 450 DUO Label (en) or DYMO LabelWriter 450 DUO Tape (en)). For consistency, the following processes outline configuration steps for the DYMO LabelWriter 450 DUO Label (en) model. Adjust the model selections as needed.
DYMO LabelWriter não está imprimindo
If the DYMO LabelWriter fails to print, install a new driver:
Access the IoT system’s homepage and click to open the OpenPrinting CUPS console.
Click in the top menu, then click the printer in the list.
Select Maintenance in the first dropdown menu.
Select Modify Printer in the second dropdown menu.

Select the specific network connection/printer on which the modification should be made and click Continue.
On the next page, click Continue, then select DYMO from the Make dropdown list.
Click on Continue and set the Model to DYMO LabelWriter 450 DUO Label (en) (or whichever DYMO printer model is being used).
Click Modify Printer to set the new driver; a confirmation page appears.
Click in the top menu; all printers installed on the OpenPrinting CUPS server appear, including the newly updated DYMO LabelWriter 450 DUO Label (or whichever DYMO printer model is being used).
Click the newly updated printer, then click the Maintenance dropdown menu and select Print Test Page to print a test label. The test label is printed after a few seconds if the driver update was successful.
To reduce this delay, add a new printer using the steps below.
Atraso de impressão da DYMO LabelWriter
Dica
If the DYMO LabelWriter 450 DUO printer is not printing at all, or is not recognized (i.e., it has a RAW driver type), then update the drivers on the device.
To resolve the delay issue after modifying the driver, reinstall the printer:
Access the IoT system’s homepage and click to open the OpenPrinting CUPS console.
Click in the top menu, then click Add a Printer.
On the next page, in the Local Printers section, select DYMO LabelWriter 450 DUO Label (DYMO LabelWriter 450 DUO Label) (or whichever DYMO printer model is being used) pre-installed printer. Click Continue.

On the following screen, update the Name to something easily identifiable, as the original printer will remain in the list. Then, click Continue.

Set the Model field to DYMO LabelWriter 450 DUO Label (en) (or whichever DYMO printer model is being used), then click Add Printer to complete the installation.

Click in the top menu and click the newly installed printer DYMO LabelWriter 450 DUO Label (or whichever DYMO printer model is being used) from in the list.

Click the Maintenance dropdown list and select Print Test Page to print a test label. The test label should print out immediately, or after one or two seconds.
A impressora Zebra não imprime nada
Zebra printers are quite sensitive to the format of the printed Zebra Programming Language (ZPL) code. If nothing comes out of the printer or blank labels are printed, try changing the format of the report sent to the printer. To do so, activate the developer mode, go to , and search for the corresponding template.
Veja também
Barcode scanner issues
Os caracteres lidos pelo leitor de código de barras não correspondem ao código de barras
By default, most barcode scanners are configured in the US QWERTY format. If the barcode scanner uses a different layout, go to and click the barcode device’s card. Then, select the correct language in the Keyboard Layout field.
Nota
The Keyboard Layout is language-specific, with available options varying based on the device and the language of the database (e.g., English (UK), English (US), etc.).
Nada acontece quando um código de barras é escaneado
Make sure the correct device is selected in the Point of Sale settings (when applicable) and the barcode is
configured to send an ENTER character (keycode 28) at the end of every barcode.
O leitor de código de barras é detectado como um teclado
Importante
Some barcode scanners are identified as USB keyboards rather than barcode scanners and are not recognized by IoT systems.
To change the device type manually, go to and click the barcode device’s card. Then, enable Is scanner.
The barcode scanner processes barcode characters individually
When accessing the mobile version of Odoo from a mobile device or tablet paired with a barcode scanner via the IoT system, the scanner might interpret each character in a barcode as a separate scan. To resolve this, go to and click the barcode device’s card. Then, select the correct language in the Keyboard Layout field.
Nota
The Keyboard Layout is language-specific, with available options varying based on the device and the language of the database (e.g., English (UK), English (US), etc.).